Laser Cut Farmhouse Wood Sign

I made this adorable Farmhouse tier tray sign using the XTool d1 laser cutter/engraver I purchased from my Amazon Store.
I have been playing around with it for a couple of weeks now and have finally figured out enough to show you what it can do.
I found this free laser cut file and thought it would be perfect.

I played around with the settings until the laser cut through the wood.

You can find the machine and the wood I used in my Amazon store.
Once the cut was complete, I began removing all the cuts.
I used an Exacto knife in the areas where the wood wasn't cut completely.

I was a little too rough with the thin wood, and as you can see, the small word farmhouse in the center broke.

But don't worry, I was able to repair it, and you would never know that it broke.

I used some Gorilla Glue Clear Grip and a toothpick.
I placed a small dab of glue on edge and held it in place for a moment.
I recently found this glue, and I have to say I love it. It doesn't set up as quickly as hot glue, so it gives you a moment to get everything in line and has a better hold than hot glue.
This is my go-to blue for projects like this.

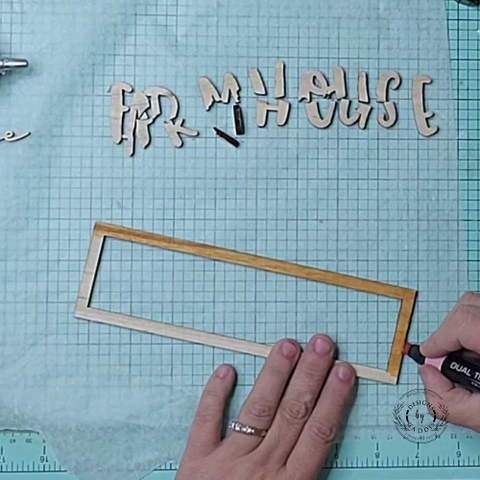
I wanted the wood grain to show, so I used some Alcohol markers I found in my stash.

Once I had the frame painted, I applied glue around the edges and attached it to the back piece.

For the larger word, I used a white paint pen. I wanted it to pop against the natural wood and painted the smaller word with a dark alcohol marker.

For the smaller word, I used a darker alcohol marker.

I attached the words to the frame using more of the Gorilla glue.

And once I had everything in place, I had this fantastic piece for a tier tray or shelf.

Check out the video on my YouTube channel to see this fantastic XTool D1 project, along with four others.
Let me know what you think in the comments.
