I started using Chalk Couture a few months ago, and let me tell you, this makes crafting and decorating so much easier and quicker.
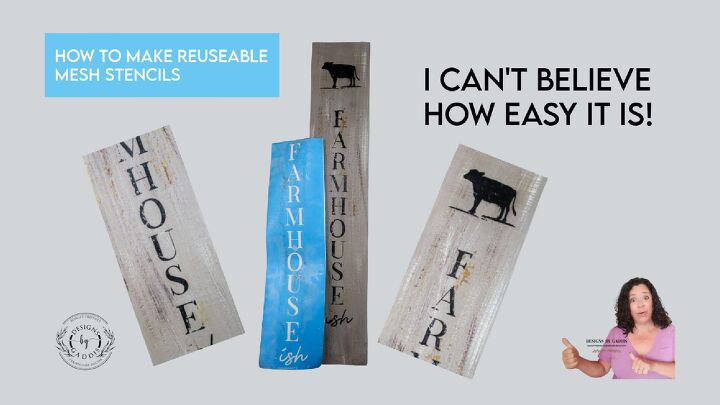
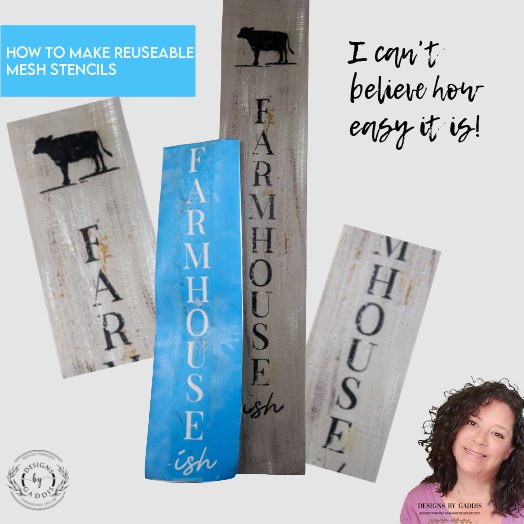
I wanted to make a Farmhouse-ish sign for my living room, but I couldn't find the size I wanted. So, I decided to make my own reusable mesh stencil.
Yeah, I know it doesn't sound easy, but it really isn't.
The items you will need are:
1. Vinyl or stencil film, I have used both.
2. Silkscreen mesh I found on Amazon and is now in my Amazon store.
3. Parchment or Wax paper. I used Dollar Tree parchment paper for
this project, but I would recommend NOT using it. You can also find the parchment paper I've used in my Amazon store.
4. Ultra Hold Heat and Bond. Be sure to use Ultra and not light bond. I tried it with the light bond, and it just didn't work as well.
5. A heat press or iron.
Watch the full tutorial on YouTube.
The first thing you will want to do is lightly press the stencil mesh to be good and flat.

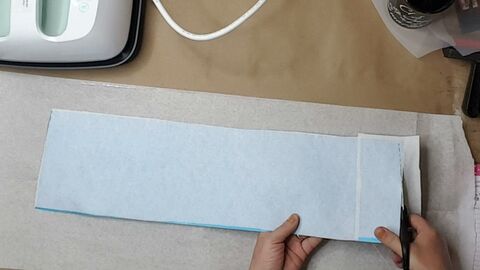
Next, cut your vinyl or stencil film and the Ultra Heat n Bond to the desired size and place it on top of some parchment or wax paper.
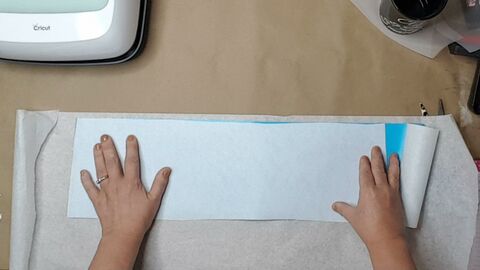
Sandwich this between the parchment or wax paper.
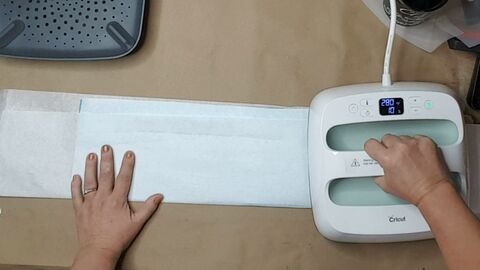
Set your heat press to 280 and press. You will want to start pressing for 10 seconds, then check to see if it took; if so, you are done with this step.
If not, continue pressing until the heat and bond is stuck to the vinyl.
Trim the vinyl down and remove any excess heat and bond.
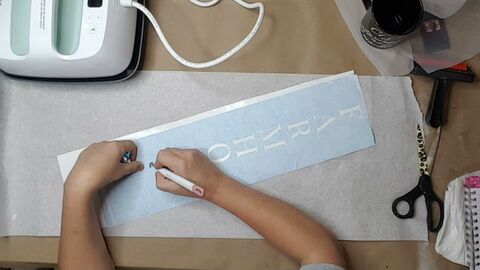
Now it's time to cut your design.
I created this Farmhouse-ish design using Design Space, but you can use any cutting software and a cutting machine.
I used the card stock setting, but you will have to do some trial and error to find the setting that works best for your machine.
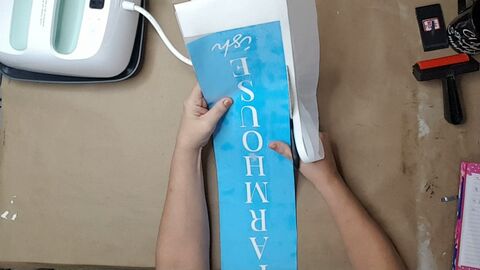
Once your design is cut out, you will want to remove the negative space or the space you want to apply paint.
Next remove the backing from the heat an bond.
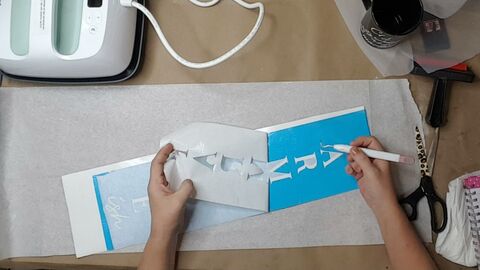
Place the silkscreen or stencil mesh on the top of your design and sandwich it between the parchment paper.
Lightly kiss the design, apply just enough heat to cause the heat and bond to melt, and attach the silkscreen.
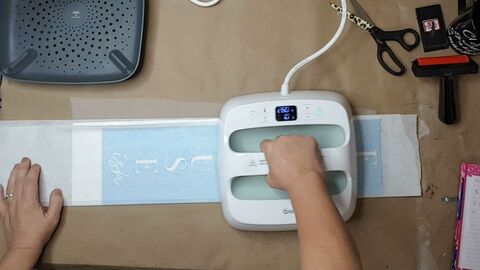
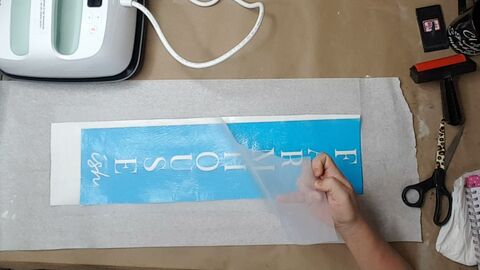
Remove the parchment paper before the design gets cool.
Trim any areas that you feel need to be trimmed. I trimmed away all the excess silkscreen.
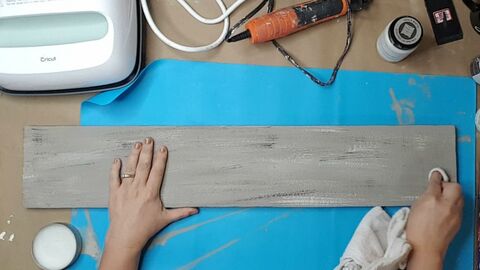
I had this piece of scrap wood that I had painted and distressed and thought it would look amazing for this sign.
I applied a surface wax layer and buffed it with a soft rag.
I applied the stencil where I thought it looked best and pressed it down with a roller.
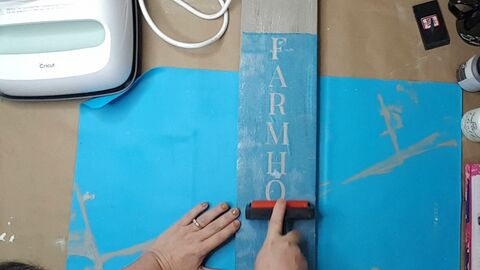
I used some Chalk Couture Black Ink and applied it to the stencil.
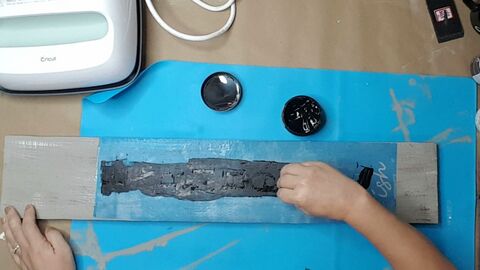
I removed the stencil, and WOW! I love it!
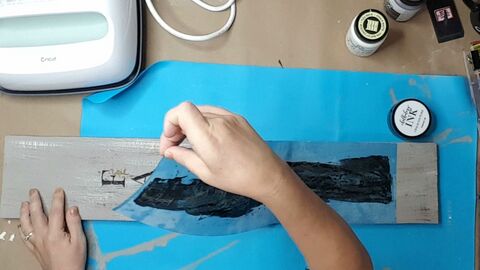
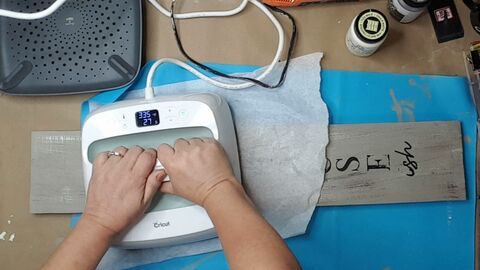
I placed the parchment paper over the design and heated it with my Cricut heat press.
I set the heat press at 335 and pressed each area for 35 seconds.
I used the cow from this Chalk Couture stencil and some black chalk paste for more of a Farmhouse-ish look.
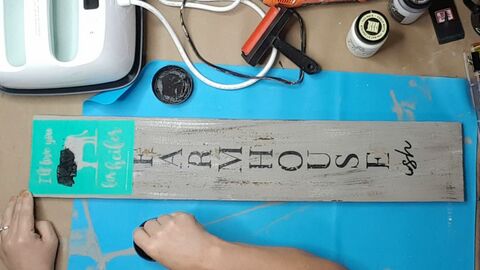
After everything was dry, I added a layer of Satin Mod Podge to seal and protect the sign.
And oh my god, the cow finished off the sign.
I love how this Farmhouse-ish sign turned out, and I can't wait to hang it up in my living room.
You know you want this cutie in your home, so go ahead and make it.
