

I love how these 4 Tier Tray mini carrots Decor turned out. I used items I already had in my stash, so that's the best part of this tier tray DIY...NO COST!
In this tutorial I will show you how to make these 4 tier tray carrots using items you already have around your home.
How to Make A Fabric Carrot

Step 1.
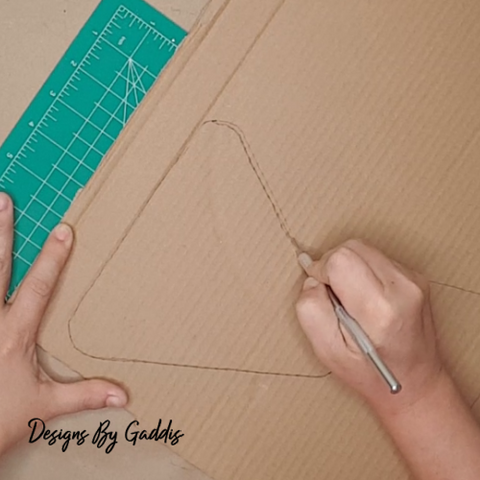
- I created this template so I could cut out the carrot.
- I used a piece of carbon paper to trace the outline of the carrot onto the cardboard.
- I put a Dollar Tree cutting mat under the cardboard and a knife to cut it.
Step 2.

- I had this buffalo print fabric in my stash that I had gotten from Walmart a while back and decided to use it for my fabric carrot.
- I placed the fabric onto the cutting mat, I traced around my template, and then cut the carrot out of the fabric.
Step 3.

- I then took the fabric and folded it in half.
- I used my iron to make a crease in the middle.
Step 4.

- I started at the bottom of the carrot and sewed the carrot up to the top. I left the carrot open so I could put the stuffing inside.
I am not a big sewer so I don't know the name of the stitch I am doing and to be perfectly honest this is about the only thing I can do with a needle and thread.
Step 5.

- I turned the carrot right side out. I used a paper straw out of my stash at the bottom of the carrot to get it turned. My fingers are just too fat.
Step 6.

- I began stuffing the carrot with stuffing out of my stash.
- If you don't have stuffing you can use plastic shopping bags, paper towels, or newspaper.
- Again I used the paper straw to get the stuffing into the bottom of the carrot.
To make the greenery at the top of the carrot I cut some pieces off of a Dollar Tree Hula Skirt, a plastic cup with some water, and some green acrylic paint.
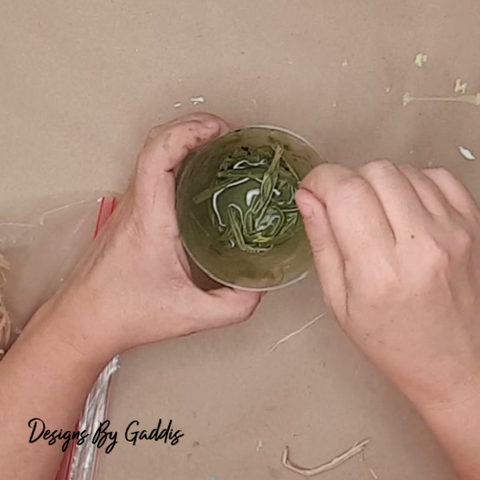
- I put some of the paint into the water and mixed it well.
- I cut pieces off of the Hula skirt and placed them in the water and paint mixture.
- I let it sit for a few minutes and then took it out and left it on a piece of wax paper to dry.
Once the grass was dry I tied a piece of twine at the bottom and secured it with glue. I then placed the tied end into the top of the carrot and used another piece of twine around the top of the carrot.

That’s it! Simple, and so stinkin’ cute!
Looking for more Easter Decor Inspiration? Check out my other Easter & Spring tutorials!
Items Used:
Dollar Tree:
- Twine
- Hula Skirt
Other:
- Fabric
- Thread
- Stuffing

My Disclaimer: All of the video footage, photos, and designs are created by me and are owned by Designs By Gaddis. You may only use the video footage, photos, and designs with my permission. My content is mine and it is protected. I am not sponsored or paid by any of the product companies or tools shown in these videos unless otherwise mentioned. I have full rights and control of the content.
Copyright @ Designs By Gaddis 2021. Any reproduction or illegal distribution of the content in any form will result in immediate action against the person concerned.