

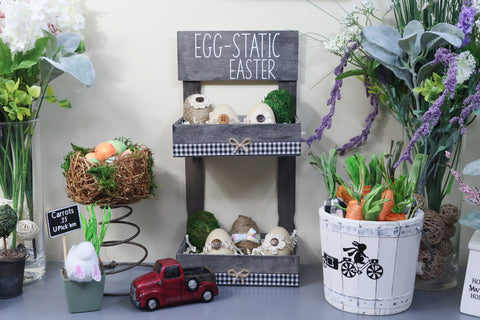
This is the cutest Easter Decor piece I have made so far. I just LOVE how this little farmhouse Easter Tray and Eggs turned out!
I used 2 Dollar Tree wood trays, 2 paint stir sticks and 1 small piece of wood from Hobby Lobby.

WATCH THE VIDEO BELOW FOR THE FULL TUTORIAL.
Join me on HomeTalk for step-by-step instructions.
Step 1.
The first thing I did was stain all the wood with a mixture of water and black paint to get the gray color.

Step 2.
After the stain was dry I used Gorilla Glue and hot glue to attach everything.
I put the Gorilla glue around the outside of the paint stick and then put hot glue in the middle.
I did this so the hot glue would help hold everything while the Gorilla glue dried.
Gorilla glue will dry completely in approximately 2-4 hours.
I placed the stir sticks on the back edge of the tray and held them in place until the hot glue dried.

Step 3.
I marked where I wanted the top tray to go with a pencil. And then made a square within the lines with the Gorilla glue and added the hot glue to the center.

Step 4.
I then used various clips to hold everything tight until the Gorilla glue had dried.
I actually let it sit for a day while I worked on other projects.

Step 5.
Next, I removed all the clips and used this piece of wood from Hobby Lobby. I attached it using hot glue since it wouldn't be holding anything.

Step 6.
I mixed up water and black paint again to stain the top piece of wood.
I decided I wanted the tray to be a little darker so I went ahead and used the stain mixture on the entire piece.
This time I used my hot air gun to dry the entire piece.

Step 7.
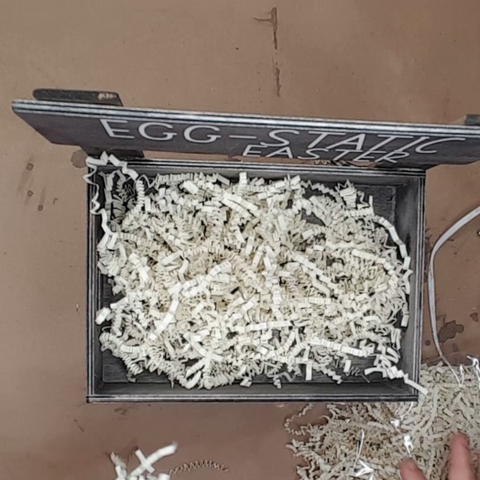
I created the Egg-static Easter in design space and used my Cricut to cut the vinyl.
I applied the vinyl to the top piece of wood trying to get it centered.

Step 8.
I cut 2 pieces of ribbon, one for each box. I cut them long enough that I could hot glue them in the back.
I wanted to cover up the part of the bottom box that didn't stain the same as the rest of the box with the ribbon.
So I aligned the ribbon for both boxes at the bottom.
I used painter's tape when I had the ribbon in place and then pulled it tight and straight and glued it in the back.
When I was finished I removed the tape.

Step 9.
I felt like it needed something else.
I used a piece of twine and tied a bow then hot glued it to the top center of each box.

Step 10.
For the hay I used some crinkle shred from Dollar General. I filled both the bottom and top trays until I was happy with the way they looked.
*** WATCH THE VIDEO ABOVE TO SEE HOW I MADE THE EGGS ***
Items Used:
Dollar Tree Items:
- Twine
- Wood Tray (2)
Other Items:
- Acrylic Paint
- Ribbon
- Paint Stir Sticks

Products I Recommend and Use on a Regular Basis:
*As an Affiliate, we may earn a small commission when you purchase thru our link at no extra cost to you.*
Most Popular DIY Videos on YouTube
- Tumbling Tower Christmas Tree DIY
- How to Make a Solo Cup Holder
- Amazing Dollar Tree Valentines Day Farmhouse DIYs
- How to Make Chalk Paint with Baking Soda
- Easiest Gnome Tutorial
- Wood Beaded Garland
- 18 Dollar Tree Christmas Decor DIY's
- How to Make Mini Wood Stack Books for a Tiered Tray
Join my community
to get FREE Printables and Special Deals only for my subscribers.
My Disclaimer: All of the video footage, photos, and designs are created by me and are owned by Designs By Gaddis. You may only use the video footage, photos, and designs with my permission. My content is mine and it is protected. I am not sponsored or paid by any of the product companies or tools shown in these videos unless otherwise mentioned. I have full rights and control of the content.
Copyright @ Designs By Gaddis 2020. Any reproduction or illegal distribution of the content in any form will result in immediate action against the person concerned.