

I love how adorable this Bucket of Carrots Easter bucket turned out. It is so adorable and super easy to make.
I picked up this little bucket on a recent trip to Goodwill. I thought it was cute and that it would make a cute decor piece this Spring.
And the best part was the price $1.99, you can't beat that. If you haven't checked out your local Goodwill for amazing deals, you need to go. You'll be surprised at some of the stuff people get rid of. I am always finding things I can use.

WATCH THE VIDEO BELOW FOR THE FULL TUTORIAL.
Step 1.
I didn't like the eggs on the front and wanted the freshen the bucket up some. So I used chalk paint and painted the entire bucket.
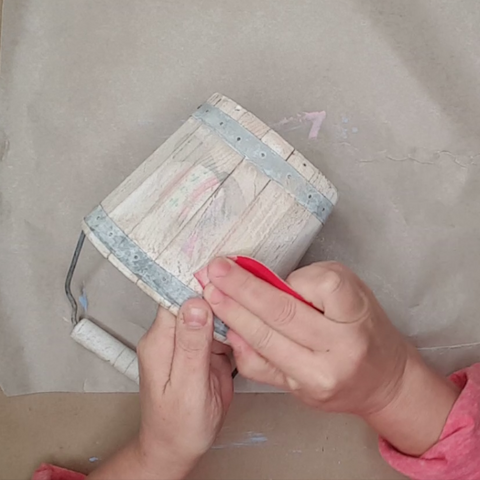
I first used some 220 sanding paper to remove as much of the eggs as I could. I was actually hoping it would remove all the paint but it didn't. If it would have I probably would have left the bucket like it was.
Once I was finished sanding I wiped the bucket down to remove all the sand dust before painting.
Step 2.
The paint I used was Waverly Plaster. It is the closest I can find to White. I can't find White Waverly paint anywhere around me.
I painted the entire bucket including the metal around the top and bottom of the bucket.
I also painted some of the inside of the bucket to just give it all a uniform look.
I left the handle as is because I loved the way it looked.

Step 3.
After the paint dried I used sandpaper again to roughen it up a bit and to remove as much paint as I could from the metal at the top and bottom.
This is when I realized I should have left the metal alone. And not painted it.
Once I was finished sanding I used another wet wipe to wipe down the bucket to remove all the sand dust. And to also clean my hands.

Step 4.
I found this cute cut file for free on Design Bundles. I'll leave a link in the description.
I did a little editing to the file in design space and cut it out on black matte vinyl.
I applied the vinyl to transfer tape and then applied it to my bucket. I think it is perfect for Spring and Easter.

Step 5.
I added Easter grass and some carrots to the bucket for the final look.

Join me on HomeTalk for step-by-step instructions.

Items Used.
Dollar Tree Items Used:
- Easter Grass
- Faux Carrots
Other Items Used:
- Wood Bucket (Goodwill)
- Design Bundles Free Bunny Cut File

Products I Recommend and Use on a Regular Basis:
*As an Affiliate, we may earn a small commission when you purchase thru our link at no extra cost to you.*
Most Popular DIY Videos on YouTube
- Tumbling Tower Christmas Tree DIY
- How to Make a Solo Cup Holder
- Amazing Dollar Tree Valentines Day Farmhouse DIYs
- How to Make Chalk Paint with Baking Soda
- Easiest Gnome Tutorial
- Wood Beaded Garland
- 18 Dollar Tree Christmas Decor DIY's
- How to Make Mini Wood Stack Books for a Tiered Tray
Join my community
to get FREE Printables and Special Deals only for my subscribers.
My Disclaimer: All of the video footage, photos, and designs are created by me and are owned by Designs By Gaddis. You may only use the video footage, photos, and designs with my permission. My content is mine and it is protected. I am not sponsored or paid by any of the product companies or tools shown in these videos unless otherwise mentioned. I have full rights and control of the content.
Copyright @ Designs By Gaddis 2020. Any reproduction or illegal distribution of the content in any form will result in immediate action against the person concerned.